
Most kitchen backsplash ideas start with tile, but the decision that makes a backsplash look right is height. The common default is 4 inches, the stretch between counter and upper cabinets is usually 15 to 18 inches, and behind a range the tile has to answer to hood and cooktop clearances. This guide found no code that sets a minimum backsplash height, so most of what follows is design judgment with the rules that do apply named.
It covers the height options, the range clearance from the National Kitchen & Bath Association, outlet rules that change your tile layout, and ideas sorted by cabinet color. Cost figures come from one Palm Beach County firm, and this guide found no independent price data for Marin, Sonoma or Napa. For the wider choices around a wall of tile, our guide to kitchen countertop materials is a useful companion.
Backsplash heights from 4 inches to the ceiling
Fabuwood, a cabinet manufacturer, says the standard backsplash runs 3 to 6 inches, with 4 inches the most popular. It describes a full-height backsplash as covering the wall between counters and upper cabinets, and sometimes running to the ceiling. Clé Tile, a tile seller, lists the same ladder: 4 inches as the minimum, 15 to 18 inches for the counter-to-cabinet zone, 30 to 36 inches or up to the hood behind a stove, and full height as the design-forward choice.
The table sets the options side by side. The heights come from published seller and manufacturer guidance, so read them as common practice, not rules.
| Option | Typical height | Source | Best for |
|---|---|---|---|
| Short backsplash | 4 inches, sometimes 6 | Fabuwood, South Florida Kitchen & Bath | Budget, open shelving, plain walls |
| Counter to uppers | 15 to 18 inches | Clé Tile | Most kitchens with wall cabinets |
| Behind the range | 30 to 36 inches or to the hood | Clé Tile | Splatter and heat zones |
| Full height | To the ceiling | Fabuwood, Clé Tile | Feature walls and no-upper kitchens |
Natural stopping points and hybrid heights
Fabuwood also offers a simple rule of thumb: end the tile at a natural stopping point, such as a window or the bottom of an upper cabinet. A backsplash that stops at an odd height, with no cabinet or window to anchor it, is the one that looks accidental.
South Florida Kitchen & Bath Design suggests a hybrid that many people forget, a 4-inch backsplash everywhere except behind the range, where a full-height slab or tile zone takes the oil and steam. That keeps cost down and puts the protection where cooking happens. Our overview of kitchen layout mistakes explains why the range wall deserves a plan of its own.
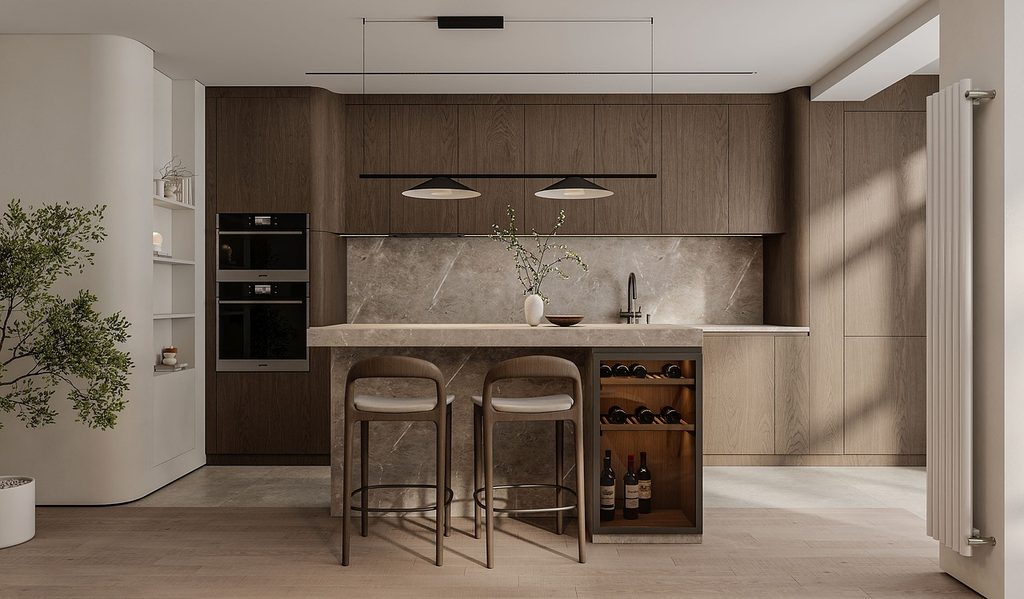
Tile limits above a range
Cooktop clearances and appliance instructions
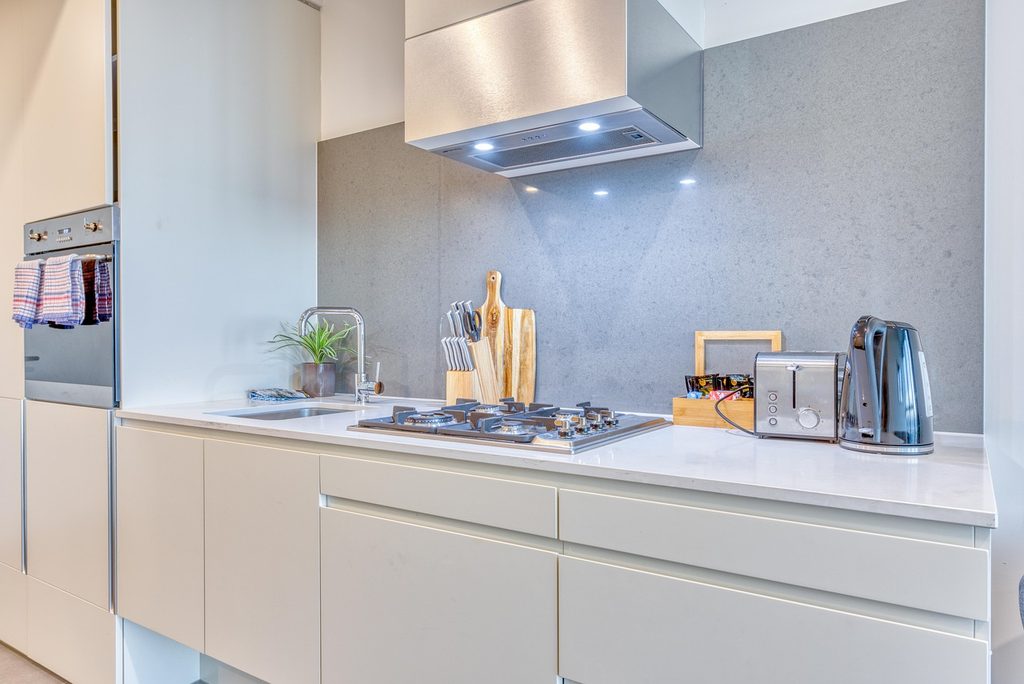
Above a cooktop, the wall is governed by clearances, not taste. The NKBA Kitchen Planning Guidelines, the same document linked above, say a cooktop or range needs vertical clearance of not less than 30 inches to combustible material and metal cabinets. The same guideline says 24 inches is permitted when an approved range hood or other approved noncombustible materials are installed.
The guideline cites the International Residential Code and tells readers to follow manufacturer specifications and local building codes. So the tile height behind a range often ends where the hood begins, and the hood’s installation height comes from its own instructions. Ask your appliance supplier for the installation sheet before you finalize the tile layout.
Ventilation and backsplash lighting
NKBA also recommends a ducted ventilation system for all cooking surface appliances, with a recommended minimum of 150 cubic feet per minute. A hood changes the wall, because it covers part of the backsplash area. Our smart kitchen design tips cover how appliances shape the cooking zone.
Lighting matters here as well. Under-cabinet lights sit just above the backsplash, and glossy tile can reflect the glare. Our guide to layered kitchen lighting shows how to place light so the tile reads well in the evening.
Outlets and tile layout
Outlets are the detail that makes a tile layout look careless. The National Electrical Code section 210.52(C), as reproduced by ElectricalLicenseRenewal.com for the 2023 edition, says no point along a counter wall line may be more than 24 inches from a receptacle outlet. An exception says outlets are not required directly behind a range, a counter-mounted cooking unit or a sink.
For islands and peninsulas, the National Fire Protection Association says the code allows outlets on or above the countertop but not more than 20 inches above it, and that elevated backsplashes on an island offer a place to put them. The NKBA guidelines add that countertop receptacles need GFCI protection, citing the IRC.
California adopts its own code editions and cities add amendments, so confirm the current requirements with your local building department before the electrician and tile setter start. A mismatch is cheaper to fix on paper than in tile, because cutting around boxes is where a backsplash gets expensive. Our post on working with a kitchen and bath designer explains who coordinates outlet and tile positions, and the timing depends on when plans are final.
Backsplash ideas for white and cream cabinets
Tile ideas for white cabinets
White cabinets leave the backsplash free to do the work. Fabuwood’s list of white-cabinet ideas names subway tile, picket, penny, herringbone, geometric and zellige among its ideas, and suggests white 3D tile when you want dimension without competing with the cabinets. It adds that marble slab veining brings color without overwhelm.
The practical split is quiet versus bold. A white-on-white backsplash with a pattern, such as herringbone, adds texture with no color, while a deep-colored tile makes the wall the focal point. Our overview of top kitchen cabinet trends shows which cabinet colors are pairing with which finishes.
Choosing warm tile for cream cabinets
For cream or off-white cabinets, a warm tile often looks better than a cool white. That is design judgment, not a measurement, so hold a sample against the actual cabinet door in the room’s own light. A cool white next to cream can look stark.
Backsplash ideas for green and blue cabinets
Light backsplashes for green cabinets
Sweeten, a renovation platform, suggests creamy stone counters and backsplashes with smoky jade and grounded green cabinets. The idea is that a soft, warm light surface lets the cabinet color carry the room. The NKBA 2026 trends release says 86 percent of respondents see greens as popular, and 78 percent see blues.
Backsplash ideas for dark blue cabinets
For dark blue cabinets, Country Floors, a tile seller, recommends white marble subway tile to diffuse light, a veined marble slab for an open feel and glossy white ceramic to emphasize the cabinet color. It also lists blue-and-white ceramic and herringbone patterns. Those are a seller’s suggestions, but they share a theme: keep the wall lighter than the cabinets.
Contrast has trade-offs. A pale backsplash against a dark cabinet pulls the eye to the cabinets, while a tone-on-tone backsplash can feel heavy. That is design judgment, so test with samples. Our warm versus sleek aesthetics guide can help you pick which mood you want before you pick a tile.
Backsplash ideas for wood and dark brown cabinets
Wood already brings grain and warmth, so Sweeten suggests simple backsplashes for stained wood cabinets: white tile, zellige, or a slab that matches the counter. For deep brown, espresso and burgundy cabinets, it suggests tumbled limestone for floors, backsplashes or hearth-style surrounds. For warm neutrals and khakis, it lists travertine.
The rule that holds across those suggestions is restraint. Busy wood grain plus a busy tile pattern fights for attention, so choose one to be the feature. Our look at kitchen design trends shows how natural, textured finishes are being balanced against plain surfaces.
If you are leaning toward handmade tile, our upcoming zellige guide covers its uneven surface, grout and sealing, and our bathroom tile pattern ideas show how layout changes the look of the same tile.
Slab backsplashes and the stack decision
Continuous slab backsplashes
The NKBA 2026 trends press release says 75 percent of respondents see slab and solid-surface backsplashes gaining popularity. A slab is one continuous piece, so there are no grout lines and the surface wipes clean. It also takes planning, since outlets, a window or shelves must be cut out in the shop.
Tile to the ceiling
Stacking the tile to the ceiling is the other big choice. Clé Tile calls full height the design-forward option, and South Florida Kitchen & Bath Design says the range wall benefits most because there is no horizontal seam for oil and moisture to reach the drywall. Tile to the ceiling suits walls without upper cabinets, such as a hood wall.
Short backsplashes with open shelving
If your uppers are open shelves, a short backsplash can be the better pick. South Florida Kitchen & Bath Design says a 4-inch backsplash is a clean budget choice that leaves wall space for open shelving or art, and that it protects against everyday splashes, not anything above 4 inches. Our rundown of the best materials for a kitchen remodel can help you compare slab, tile and paint.
Cost by height and material
The table shows one firm’s estimates, with the date. They are ballpark figures from a Palm Beach County contractor, and Bay Area labor may differ, so use them to compare options, not to budget.
| Option | Typical total | Source |
|---|---|---|
| 4-inch stone matching the counter | $300 to $900 | South Florida Kitchen & Bath, April 2026 |
| Tile at standard height (18 inches) | $1,200 to $2,800 | South Florida Kitchen & Bath, April 2026 |
| Full-height tile to the ceiling | $1,800 to $4,500 | South Florida Kitchen & Bath, April 2026 |
| Full-height stone slab | $2,500 to $6,500 | South Florida Kitchen & Bath, April 2026 |
The same firm lists tile material at $8 to $30 per square foot and installation at $12 to $20 for standard-height tile. Projects Within Reach has not published backsplash prices, and this guide does not invent any. Written quotes for the same layout are the only reliable comparison.
Where a backsplash fits in the whole project matters more than its own price. Our post on planning a modern kitchen remodel without overspending shows where it sits in the overall budget, and our tips to help you save when remodeling show where to trim if you choose a taller tile.
Finishing details that make it look right
Planning the top edge
Decide the top edge before the tile arrives. A backsplash that ends below the uppers needs a clean cap, trim piece or a finished edge, and one that ends in open wall needs a plan for the paint line above it. Ask your installer to show the edge detail on a sample.
Testing full-size samples in the room
Sample in place. I tell clients to tape full-size samples to the wall for a few days, because a tile that looks calm on a showroom board can look loud above a counter. A look at our project gallery can also help you see how different heights read in finished rooms.
FAQ
Standard backsplash height
Fabuwood says standard backsplashes run 3 to 6 inches, with 4 inches the most popular. Many kitchens instead tile the full 15 to 18 inches up to the uppers, per Clé Tile. No code was found that sets a minimum height, so choose by how you cook and clean.
Backsplash behind a range
Many designers carry the tile up to the hood or to the underside of the upper cabinets. NKBA guidance requires 30 inches of vertical clearance above the cooking surface, or 24 inches with an approved hood or noncombustible protection. Check the appliance’s installation sheet first.
Matching the backsplash to the countertop
A matching slab is a clean, seamless look, and Sweeten suggests it for stained wood cabinets. A contrasting tile adds pattern and texture. Choose based on how much veining or color your counter already has.
Next step: a short conversation
If you are choosing between a short backsplash and a full wall of tile, book a free discovery call. It is an honest conversation about your home, with no sales pitch and no obligation. Ask for our free “Planning your remodel budget” guide, and use the contact page to start. You can also see how a project runs, from first sketch to final walkthrough, on our proc